Friday, December 9, 2011

Taquitos At Home

There is a mexican restaurant in my hometown called Pedro's. The food can't be beat. Everytime that Travis and I go, we get the bean and cheese burrito and taquitos. The food is delicious, but not exactly nutritious. My cousin and fellow blogger David, enjoys recreating his favorite meals from out in the world in his own kitchen. I like to take my own spin on this approach, by making meals in my kitchen that I wouldn't eat out in the real world (either due to the fat content or ingredients that are unsafe for me). This is where the taquitos come in. I was motivated to find a way to make them healthier than the deep fried restaurant style, and less chemically-laden than the frozen restaurant aisle taquitos my husband has been eyeing lately.

Let's get started....

Grab some corn tortillas. Corn is a better option healthwise than flour. Before you get started, preheat your oven to 375.
I made carnitas over the weekend, and had a bunch of leftovers. I posted the carnitas recipe on 9/16. Decided to kick up the seasoning a little bit for the taquitos and mixed the leftover shredded meat with chili powder, garlic powder, and a little bit of salt and pepper.


This next step is very important. You need to heat up your tortillas. This helps to prevent them from cracking when you roll the taquitos. We don't have a microwave (yet! haha) so I dry heated mine on the stove top. Just heated up a skillet and warmed the tortillas there, no oil, no pam.

Grab your favorite baking sheet and line with foil. Spray the foil with nonstick spray. Set your warm tortilla on there. (If you warm several at a time in the microwave, just keep them stacked under a dish towel and they'll stay nice and warm). Place your carnitas in a line down the center of the tortilla. Roll it up into a cigar shape.
After you do one, the process becomes quite easy. Get rolling!Dampen a paper towel, and lay this over the rolled taquitos as you prepare the rest. This will keep them moist and prevent the cracking.

All rolled up and ready to head into the oven. Bake in the oven until crispy....14 to 16 minutes. After they are done, I recommend spraying a little bit of Pam on top of the crisped taquitos, and sticking them back in the oven on a low broil setting. This will help them to get nicely browned and extra crispy.
I was feeling a little bit impatient, so I put a teaspoon of oil into a pan and browned them this way. Not a bad option, but not quite as healthy as spraying with Pam to brown.

Yum, yum, yum. Crispy, crunchy, golden brown, and free of junk!
Knowing that these taquitos are WAY healthier than normal store bought or restaurant bought ones, I accommodated my cheese loving husband by spreading some grated cheese on top of the taquitos, and sticking them in the oven under broil. This just helps to melt the cheese quickly.
Keep an eye on this, the cheese melts quickly and you don't want to burn your taquitos after all of this hard work!

Here is my hubby's plate....
Here is my plate.... I added some homemade salsa, with sour cream on the side. So delicious. I was really pleased with how crisp the taquitos turned out.
The best part is that they received Travis's approval - success!

Go make these for your family :)
Mary

Tuesday, December 6, 2011

Easy Veggie Side

I'm always looking for easy ways to cook up veggies....especially now that my sweet husband is NOT a veggie lover. I'd even venture to say that he hates veggies. However, since I have two degrees in health related fields, there is no way that I'm giving up without a fight. I offer to make whatever veggie he is willing to eat, and do my best to come up with creative ways to cook them. The first time I made zucchini for him, it didn't wow him. I thought it was great - zucchini cooked in a little olive oil, seasoned with salt, pepper and garlic powder. Yum!

To me, basically any veggie is good with olive oil, salt and pepper. But for my picky husband, I had to work a little bit harder. I turned my search to the internet to help with my quest and found a Cooking Light recipe for Zucchini Oven Chips.

Let's get started....


Here are the ingredients: grated parmesan cheese, bread crumbs, 1% milk, garlic powder, salt, pepper, pam, and of course a zucchini!

Begin by washing and cutting your zucchini up. Lop off the top and bottom.

Slice your zucchini into 1/4" slices.

Next, mix up 1/4 cup of the breadcrumbs, with 1/4 cup of the parmesan. Then add in 1 teaspoon each of salt, garlic powder and ground pepper. Mix it all together with a fork or a whisk.

Put a few tablespoons into a shallow bowl. To begin the process, dunk the zucchini slices into the milk....

....and then move them to the breading mixture and dredge in it.

Get out your ovenproof wire rack and give it a generous spray with the Pam - then set that on top of a baking sheet. Place the dredged zucchini on top of the wire rack. Make sure to give them a little space. The reason we use the wire rack here is to help facilitate air circulation on both sides of the zucchini....this gets that extra crispy factor that makes them so yummy!

Here they are, ready to go in the oven. Place them in your 425 degree preheated oven. Bake for 30 minutes or until lightly browned and crispy. Have fun tasting them as they get close to being ready!

Take them out of the oven and enjoy the fruits of your labor!

The verdict was good....he liked them and said he'd eat them if (WHEN!) I make them again.
Success!

Go try these out on your picky eaters :)
Mary


Monday, December 5, 2011

A Day in the Life inside Derek's school lunch....

While it took over 16 years for Derek to come to the "healthy side", he made the transition out of the blue one day and has never turned back. He always asks himself, "Do I have time to eat that?" and sometimes asks me if he has time to eat it? Thought I would share a typical lunch of my student athlete....all natural peanut butter and all fruit spread, strawberry or blueberry, on whole wheat bread. Some kind of healthy cracker or chip, all purchased at TJs and all have at least 3 grams of fiber per serving. This here is Vegetable Root Chips, but could be sweet potato chips, Soy and flaxseed tortilla chips, whole grain pita chips, Blue corn tortilla chips, Sesame crackers we used to be able buy at Costco, etc. Some kind of hummus, he loves the Edamanne Hummus at Costco, veggies (always carrots, celery, and snap peas), trail mix with a little treat in it like dark choc or peanut butter chips, a piece of fruit, and some kind of treat, usually a piece of dark chocolate or cookie.
Take care to realize that Derek is an athlete, so he will consume these calories throughout the school day, and it needs to get him through his afternoon practice. Most of us cannot eat this amount of calories. And calories do count. The more you consume over what your body can tolerate, will be stored as body fat.

Sunday, December 4, 2011

Let the competition begin....

Bloggers note: To grill veggies, I use non-stick grill pan and olive oil spray on both sides of veggies, s and p. I will put a heavy pot to help expedite the cooking process as well placed right on top of veggies for a few minutes.

Okay, Mary writes awesome post, so now I feel challenged to do the same. Easy peasy homemade healthy pizza, here we come....
Time intensive, but super easy. You need the afternoon to have the tv or radio on nearby and just the time to grill away on your non-stick grill pan.
I love eggplant, zucchini, baby broccoi(which I steam), red onions, red pepper (which I put right over a flame on the burner then once charred, I throw in the paper lunch bag and when cool, rub off the charred skin)
and the tomatoes ( if I have fresh, cut if large, leave if babies, then drizzle with a bit of EVOO, s and p, and roast in hot oven til browned and soft, or I use sun dried tomatoes, in bag from TJs, not oil packed). Next comes the homemade dough, or packaged, TJs has a few kinds to choose from, I always go with the version that is higher in fiber, though this is not WHOLE WHEAT which I would prefer. And your favorite cheese, I like the mildness of mozzarella, I am not a cheese lover, so I use very little, surprise, surprise.
Next comes your favorite healthy sauce option. I usually make my own in big batches and love Giada's recipe which is chocked full of veggies which no one knows about because I puree my sauce.
So before you start anything, get that dough out of bag and cut into 4 portions. This is the perfect personal pan pizza size for most people. Calories on dough is 240 calories.
Ingredients:
dough
sauce
grilled veggies or whatever toppings you like
cheese
chopped fresh arugula or spinach
Plan:
Heat over to 450/500 degrees. Heat pizza stone if you have.
Portion dough, roll into balls, and cover with dishcloth on counter
Make sauce
Grill veggies, ready all toppings
Roll dough to desired thickness, I like mine on the thin side, the more space to put my toppings
Place on pizze peel if you have,using a bit of corn meal to allow dough to roll off peel. Or place lightly on cookie sheet with corn meal or nonstick foil
(Inexpensive at Smart and Final, or sets available at Bed Bath and Beyond.)
Top with sauce, cheese (I use a little sprinkle at this point), mounds of veggies, a bit more cheese, then into the oven.
My little guys cook for about 8-10 minutes at this hot temp.
I love to top mine off with red pepper flakes, and a sprinkle of kosher salt, then mounds of arugula or spinach. My pizza, veggies are FREE, are less than 350 calories. Mark and the kids, with tons of cheese and meat, can't vouch for them!!

Saturday, December 3, 2011

Ravioli...easy as 1, 2, 3!


The past few months have been crazy...so I must begin by apologizing for not posting! I have a plethora of food pictures that I've taken, so I'll be sure to get those up. Decided I needed to come back with a bang, so first up I bring you: homemade ravioli!

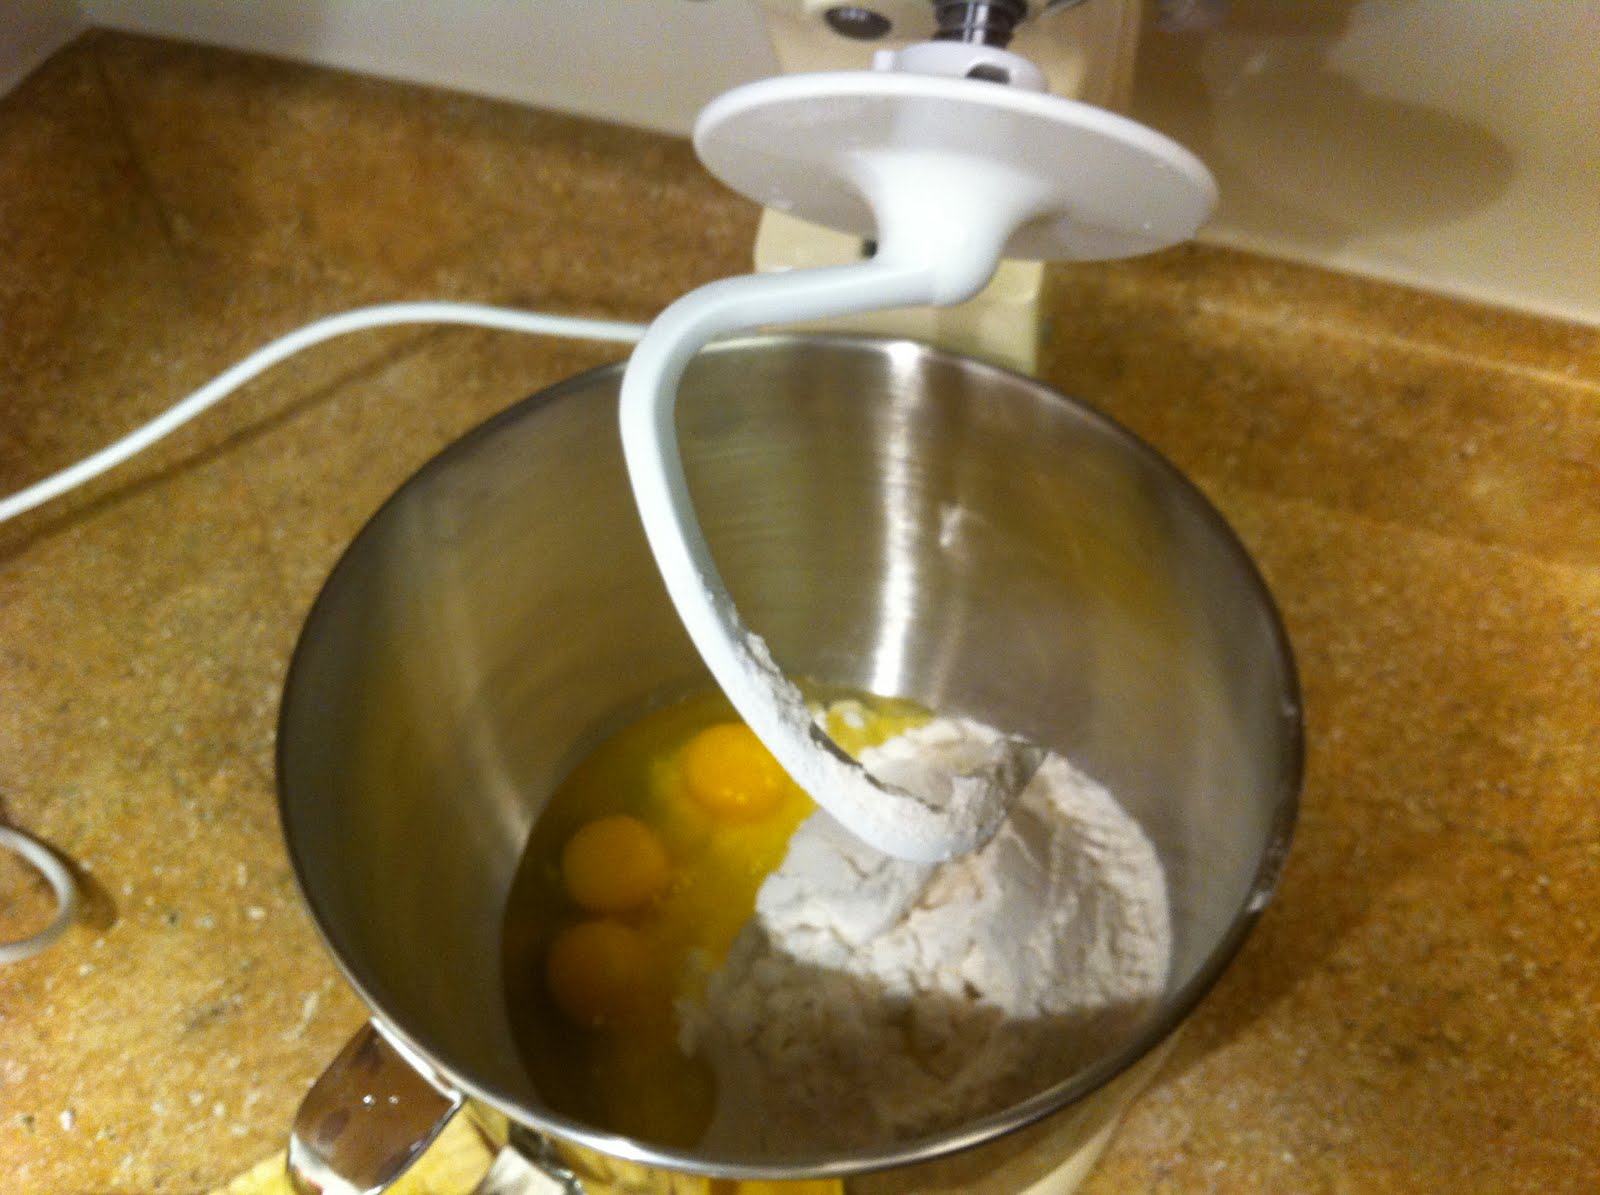
Place 3 cups of all purpose flour, and 3 eggs into a kitchen aid with a dough attachment. [If you're feeling particularly motivated, you can mix the dough by hand. You make a well in the flour and place the eggs and olive oil in it, then start mixing!]
Add a half teaspoon of salt...
And 3 tsp of olive oil (that equals 1 TB!)

Next, add 1 cup of water. Once you start adding the water, the dough will start to form into a ball!


Place a whole bunch of flour on the (clean!) counter, and place your dough ball on the counter. Start kneading! Basically you punch the dough, gather, flip, punch. Keep going. Don't overknead...you'll get a sense of when it's pretty well formed.Lightly coat the dough ball with olive oil, and wrap in plastic wrap. Let your dough rest for 30 minutes. Take this opportunity to pour yourself a glass of wine! :)
How relaxed and rested does my dough look??
Grab your rolling pin and roll that sucker out. Try to get a general rectangular shape. Now I really felt that I couldn't get the dough as thin as it needed to be for ravioli on my own with the rolling pin. But I don't have a pasta roller quite yet, so this had to do. If you have one, whip it out now and get rolling! (Initially roll with rolling pin, then put through pasta roller).
Once your dough is ready, work on your filling. We chose to do a ricotta/parmesan mixture with sausage. You could also do sweet potato or pumpkin filling if you're feeling seasonal...yum! So now I'm heating up my sausage...(place a little bit of water in a pan with the sausage,then put the lid on. Once the water is all gone, the sausage is ready! Let it brown up a little bit).
For the cheese part of the filling, I mixed ricotta, parmesan, pepper, a little salt, and oregano. You could do thin individual strips of the dough, but I chose to make it a little bit wider so I could simply fold over the dough.

Place a dollop of the cheese mixture, and top with a little of the cut-up sausage. Place each spoonful about a 1/2 inch a part. Not too close to the edge.
Fold the dough over. Use your fingers to define the area around each filling a little bit.Grab your handy dandy ravioli cutter that you just got from William-Sonoma! If you don't have one, don't fret...you can grab one for about $12 or get creative. Use a pastry cutter or small cooke cutter.
Cut your ravioli out! Hold the ravioli cutter over each area of filling.
Get a bunch of them made. In the meantime, you need to boil some water. Make sure that you salt it very well! Salted water = flavorful pasta.
Place your prepared ravioli into the boiling water. Make sure that all of your ravioli edges are sealed tightly so your filling doesn't come out while it's cooking! Be careful not to get burnt when you drop the pasta in - gently!
Boil, boil, boil! It takes 3-5 minutes to cook. You'll know when it's ready because your ravioli will rise to the surface of the water.
Remove cooked ravioli from water with a slotted spoon so that you don't get a watery bowl of homemade ravioli. We topped ours with a drizzle of olive oil, salt and cracked pepper. You could also do a marinara sauce, or a sage butter sauce. Have fun and make it work for your tastebuds!
Super easy to do...and a really fun thing to do with someone you love!

Get cooking -
Mary


Thursday, November 17, 2011

She returns....

After not blogging for 5 months, yikees, I am back. I have missed writing, but continue even in the midst of my busy life to exercise and eat healthfully. That never changes for me no matter what!! I have decided that my vanity is a huge motivation for me, along with the fact that I need to control things in my life, it is a issue!!, and the few things I can control regarding how I look along with my health and ultimate future, is how I take care of my body.

Lots of life changes for us, all good by the way, check out Evan's Caringbridge site as well as my personal FB and foundation pages, to get caught up. Tomorrow my husband will turn 50. A huge deal for him and most people. Since Mark still thinks he is 18, turning 50 is a big deal, so I am sending him off with a long time friend to have some boy time this weekend. This summer he was diagnosed with ulcerative colitis. An autoimmune disease with no cure, but something that their goal is to get into remission. Of course this nutritionist/personal trainer wife has been insisting that he must modify his food, and what we did find out from his doctor, who specializes in his disease, is that moderation is best (told you so) and that his heavy intake of caffeine from coffee and diet cokes, cannot continue (told you twice). I even annoy myself with this by the way. None the less, after making him get on the scale at the doctor's office to confirm my fear of his weight creeping up, he came home making the decision to make some changes and he asked for my help. Unfortunately, living with me is hard enough, then add in to my daily roles of wife and mother hen, nutritional consultant. Not a good thing on the receiving end I am sure.

You might want to know why I am sharing, after not writing for 5 months. Well, two things, 1. I have missed blogging and sharing here very much, 2. The words that come out of Mark's mouth in regard to making these changes are most likely things most of you have said, so I feel like if I share his struggles and misunderstanding in trying to modify his food intake, then you might learn something as well. So here goes....

Day 1 came with a computer print out of some of the things he ate. I was quick to ask what was missing and realized several things along with the fact that everything was guesstimated. Not an option, because what we do know based on studies done with real live human beings, is that everyone underestimates their caloric intake. That being said, I have reiterated that everything, yes everything, must be measurable, and calorie countable in these early weeks as one begins to learn portion control. This is something Mark keeps telling me he didn't sign up for. And while I get that, and am more than willing to count every calorie I prepare for him, if he doesn't follow my game plan, then I am not playing. Sucks I know. But here is the learning lesson. This will be one of the most difficult things a human being will encounter. The majority of the population has a weight problem, indicating that trying to lose weight is one of the most difficult endeavors one my partake in. The other facts are that by changing your unhealthy eating to program of moderation, not only will you lose weight, but you will look and feel better, and ultimately have better health. So, what I found out was breakfast was a thin (100 calorie whole wheat bread product, many brands available for purchase now, 2 teaspoons of peanut butter, which by the way was probably at least 6 times that amount in reality, a 16 oz smoothie which he made in our vitamix, but no way to calculate calories without having some idea of what quantities of fruit and juice he used. Oh, and he sprinkles sharp cheddar cheese on that thin with PB, gross I agree!! So guesstimate on calories have to be about 700. Since he was out at lunch time, I suggested Flame Broiler, calories available for all items, and I suggested a side of steamed veggies with all the hot sauce he wanted and a regular bowl with chicken or beef, brown rice and green onions. FYI, I NEVER count the calories of veggies, only the stuff they are cooked/eaten with. 500-540 calories depending on chicken or beef. That afternoon I took out cashews, his go to snack and portioned out 250 calories bags. When I asked him how many calories he thought were in them he said 500. I told him if that was true, then he was eating over 1500 calories in cashews every day. Bottom line, hoping in time he will start to get his calorie radar in sync with reality. This is most people's flaw, knowing what they are consuming!!
Dinner, I knew what I was making. Fist tacos: corn tortillas, tilapia sauted in non-skillet and pam, s, p and chili powder. YUM. Homemade salsa, shredded cabbage, and tapatio. 4 tacos, 650 calorie yummy dinner, and then I made him measure his one cup of applesauce for snack. We got out with over my 200o recommended calories and his 2500 desired calories.
Day two: thin, I measured PB, he sprinkled cheese with no measure, hmmm, sandwich provided for him at school turkey trot, he was announcer. Compared to Subway, being a little smaller than 12 inch, turkey, veggies, cheese, mustard, so guesstimate on calories...gonna call that at least 600, 1 measured cup of applesauce for snack, then I made breakfast burritos for dinner. 2 whole wheat flour tortillas, 240 cal, 1 cup egg beaters 120, 2 oz sharp cheddar cheese 200, hashbrowns cooked in pam 60, ham 60, served with bowl of salsa which he only ate half of, remember it was FREE, total 2100. Just had banana as delivered posters to Derek at school, 8:30pm and will have fudge frozen pop for dessert, 120, so again we sit in between our calories. Good compromise.

I want to acknowledge I can only imagine how difficult it is to moderate your food when you have been in an "I don't care" mode. I have moderated my food for over 25 years now, so it is part of who I am. I will guarantee, once you make the decision to make better choices, it becomes second nature. Derek made the change last spring, and now totally "thinks" about what he is eating, plans for what he is eating, and actually feels much better, has more energy, etc.

Glad to be back, hope you find this helpful. g

Wednesday, September 28, 2011

Quick Lunch!

I have been running late for approximately the past 4 days. I hate being late, but there is a lot going on lately and somehow, I can't seem to quite keep up! This led to yesterday... I was hungry, wanting some veggies, and without a lot of time to make an awesome lunch. A quick check of the fridge revealed that we had a lot of vegetable choices, not a lot of protein options, and a nice loaf of whole grain bread. Next I moved to the pantry, knowing that my options there for protein were either a can of tuna or beans, most likely. Luckily I found a can of white kidney beans aka white cannellini beans. Yum! These beans are creamy and firm and delicious.

So now my quick lunch begins....
Grabbed my handy dandy can opener...
And drained the fluid. I also rinsed the beans in cool running water. Let them hang out for a little bit so the excess water drains off. Feel free to nibble on a few as you get your food ready. :)
Do you know what a powerhouse cannellini beans are?? 1/2 cup of these babies has 120 calories, 10g of fiber, and 8g of protein! There are 200mg of salt, but rinsing them in cool water helps to get rid of the excess salt! Excellent source of protein and fiber, though.
I love green onions. Anyone else? I could seriously add them to almost anything. A milder flavor than the larger varieties.... and so cute and crunchy! I missed a few pictures here (remember, late and overwhelmed for the past 4 days!)... but I threw the cannellinis in a bowl, added a splash of balsamic vinegar, with salt, pepper and red pepper flakes. Topped with a drizzle of honey and a sprinkling of the chopped green onions.


Next.....grab some asparagus! Rinse them off and break off the ends. The end of the asparagus is very tough and not much fun to eat. Put on a little (1 tsp) olive oil and salt and pepper. Throw on your pre-heated grill [I will stretch out summer and grill using for as long as I possibly can!]
After the asparagus are browned a little bit on each side (thinking of the extra browning as added flavor!), throw them into a pan. You can totally stop after the grilling process, and I often do, but I was in the mood for a little bit of extra flavor so I improvised and came up with this next step. So, back to the pan. Before adding the asparagus, place in 1 tsp of olive oil, 1 TB of soy sauce, and a drizzle of honey. Add the asparagus and stir to coat. The honey helps the mixture to carmelize just a tad. Salty, sweet, mmm.

I skipped a few pictures.... like I said, I was hungry and soon to be running late! Next, I cut a few slices off of the bread, did a tiny drizzle of olive oil and stuck them on the grill. Flip after a few minutes.

Although a few pictures are missing, I did manage to get a final picture shot! This gorgeous meal took me less than 10 minutes. The bread and the beans came mostly prepared as they were, with me just adding a little bit of seasoning. The asparagus are thin and cooked very quickly on the grill. Tossing the asparagus in the olive oil/soy sauce/honey mixture took about 2 minutes total!
My biggest recommendation to you is to get creative in the kitchen. You can really come up with some delicious and visually appealing meals in a short amount of time. Remember, we eat with our eyes first, so take an extra moment to treat yourself to a beautifully arranged plate and you will enjoy your meal that much more!

Mary